Expense Approval
Approval Workflow Overview
📤
1. SubmitsEmployee submits expense
👀
2. ReviewsFinance Admin reviews details
✅
3. DecisionApproved or Rejected
📦
4. PayoutReimbursement process starts
How to Review & Decide
Reviewing Expenses
- From the sidebar, click Expenses.
- Click on a submitted expense to view its details.
- Check all the details: Expense title and description, Amount and category, Vendor information, Attached receipts, Location data.
At the top-right corner, you'll see two buttons:
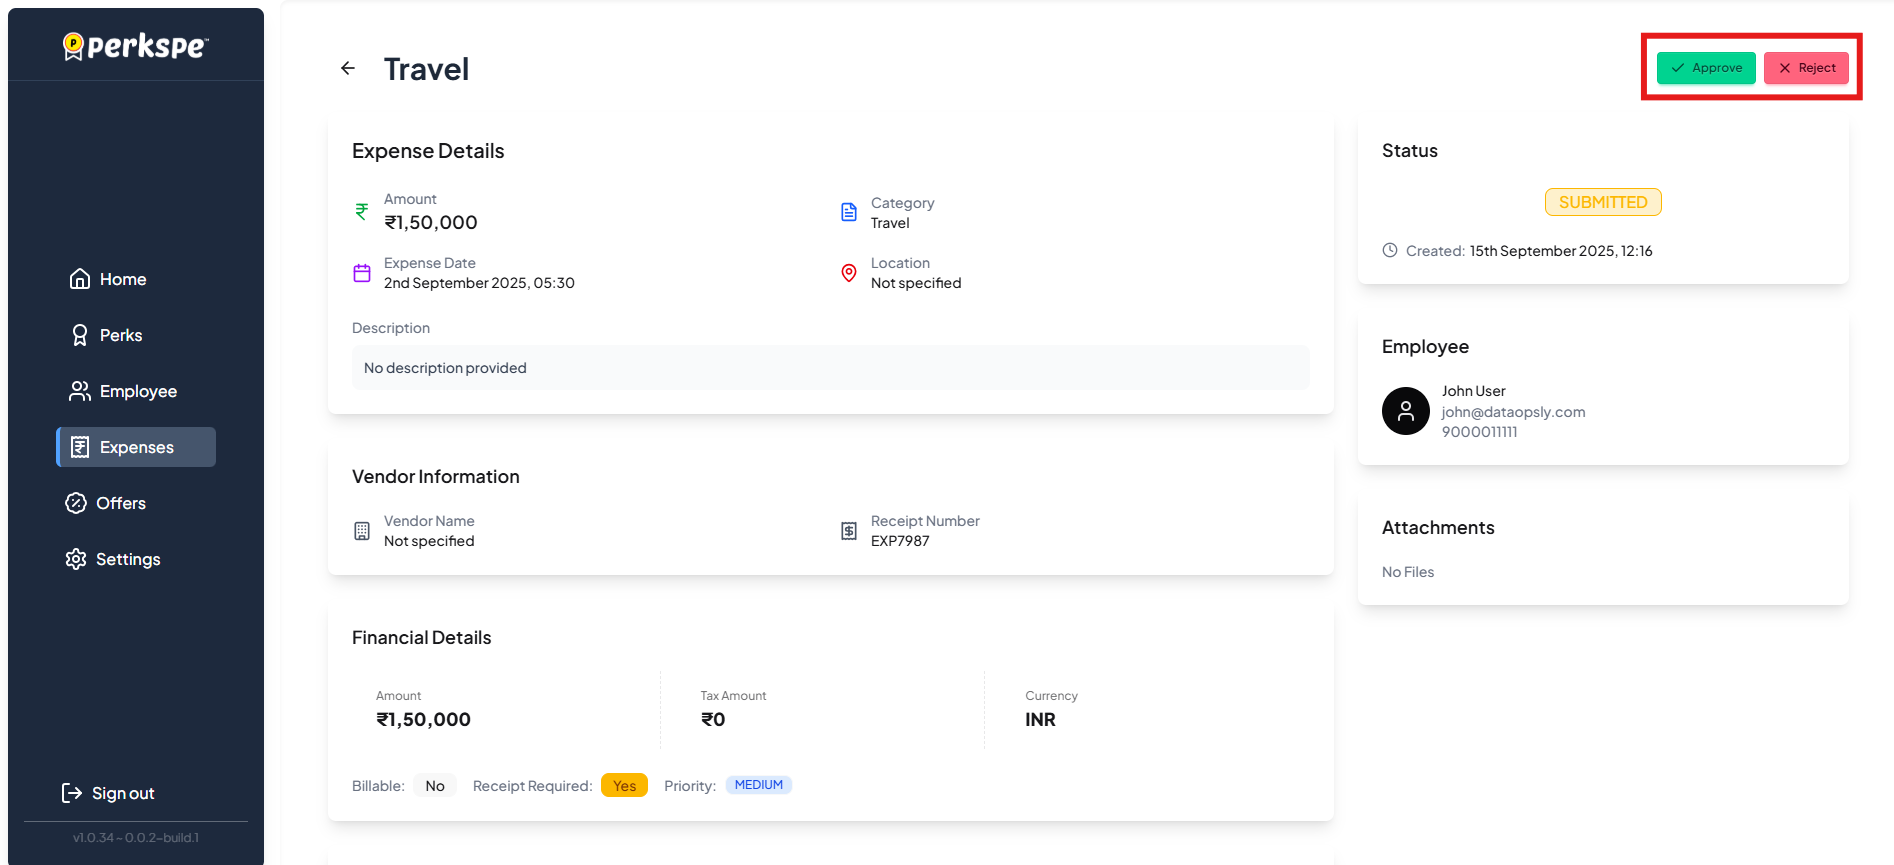
✅
Approve
Accept the expense
❌
Reject
Decline the expense
How to Approve an Expense ✅
- Click the Approve button.
- An approval popup appears.
- Add approval notes (optional) - Example: "Approved under client project ABC".
- Click Approve to confirm.
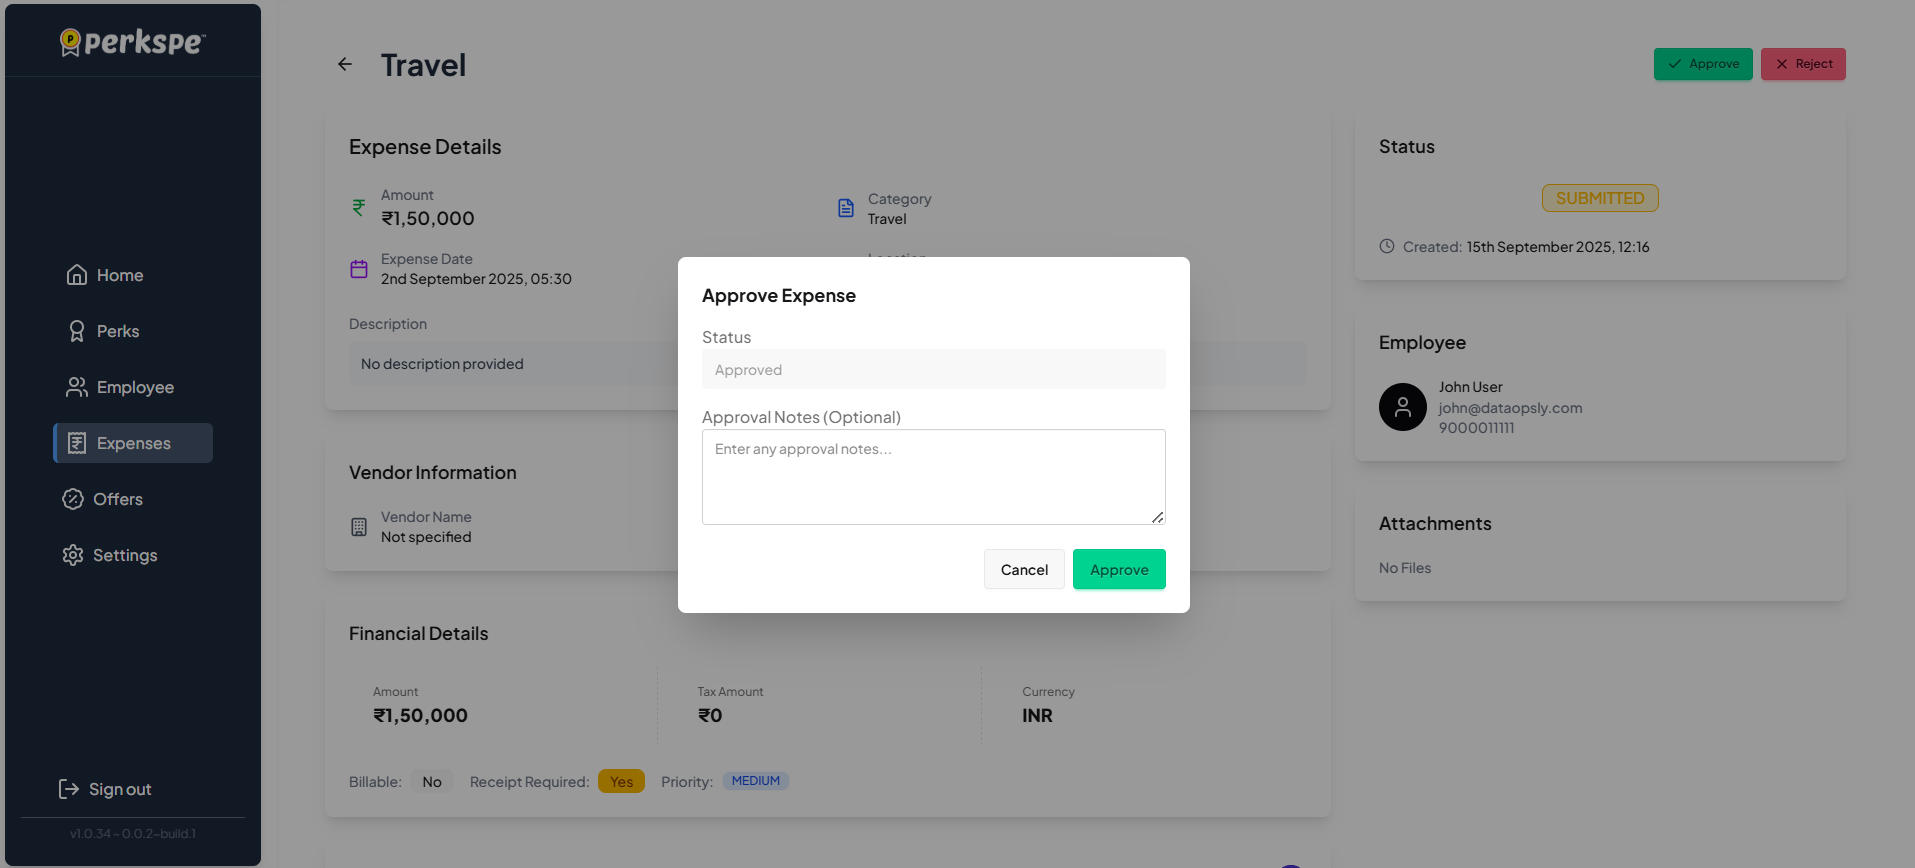
After Approval:
- Status changes to Approved.
- Employee is notified.
- Reimbursement process begins.
How to Reject an Expense ❌
- Click the Reject button.
- A rejection popup appears.
- Enter the reason for rejection (required) - Example: "Missing receipt".
- Click Reject to confirm.
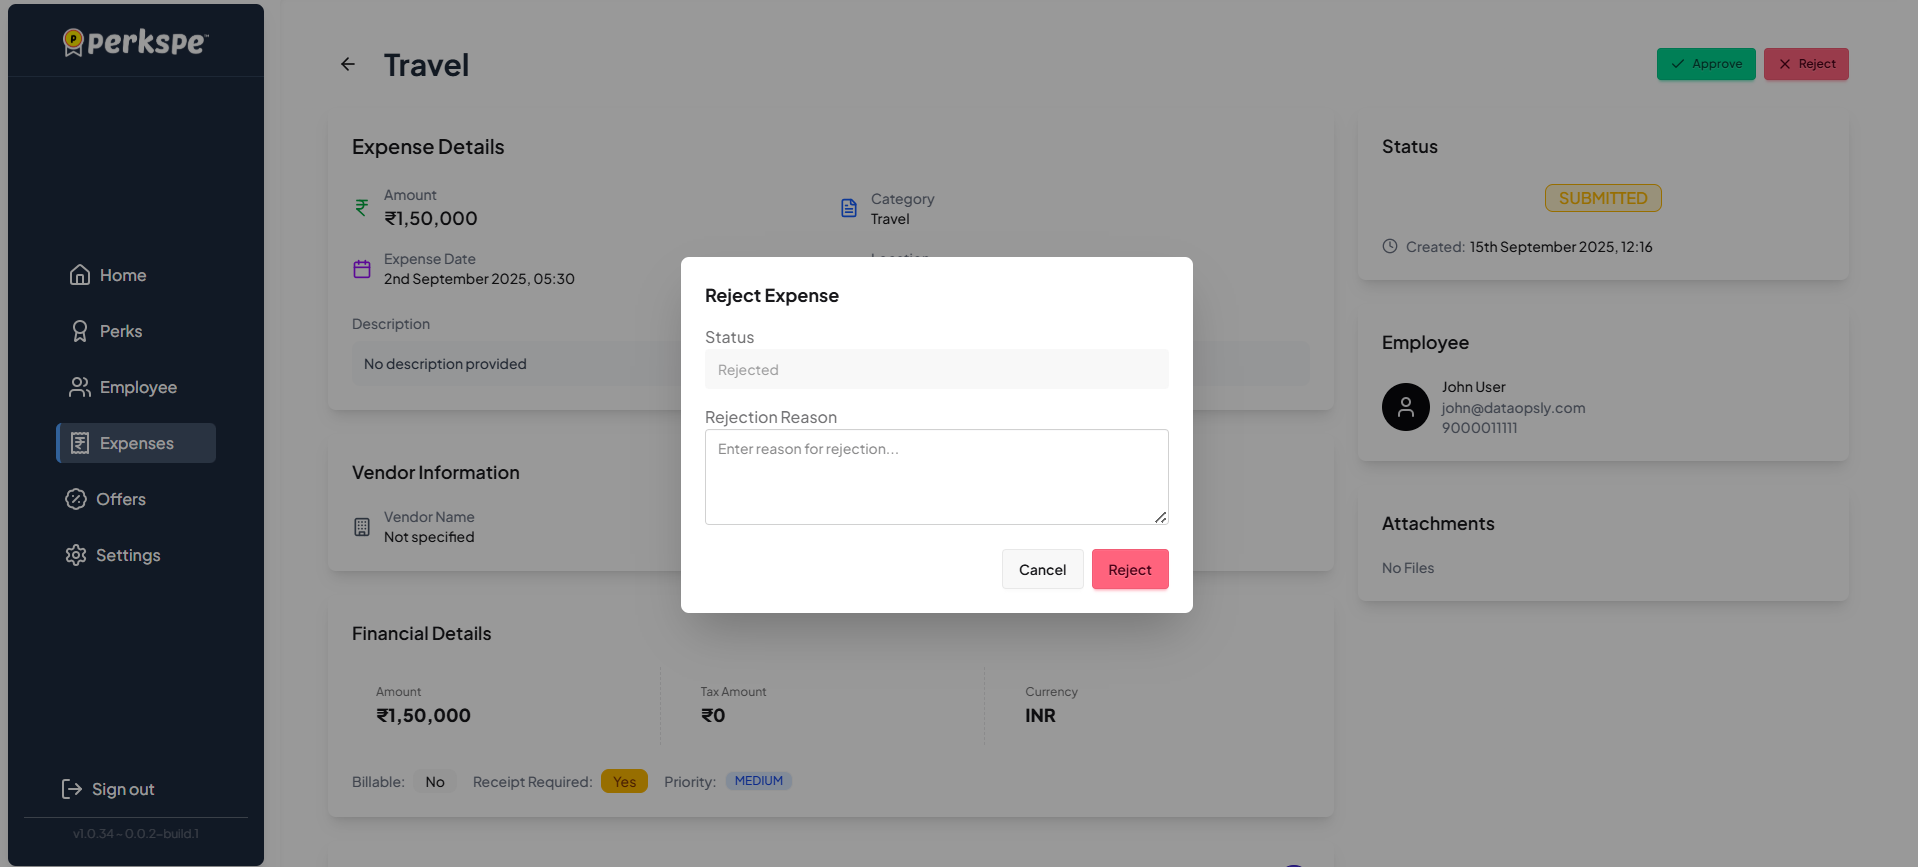
After Rejection:
- Status changes to Rejected.
- Employee is notified with the reason.
- Employee can revise and resubmit.
Tracking Expense Status
All approved and rejected expenses can be tracked in the Expenses menu.
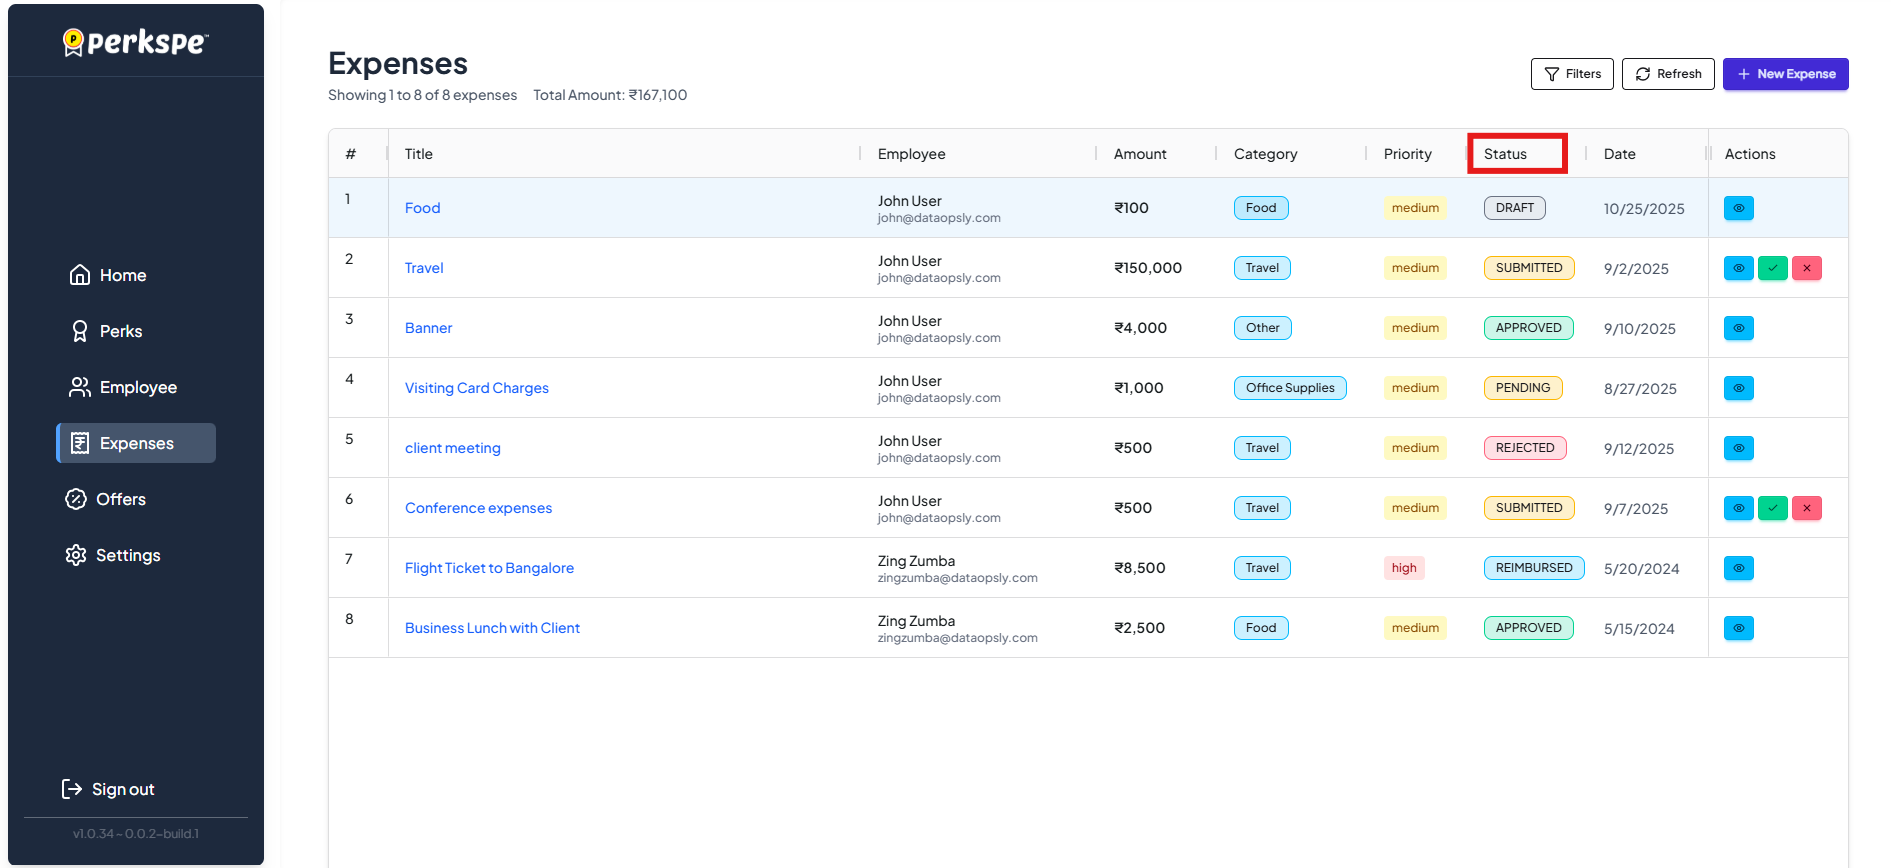
🟡
Pending
Waiting for review.
✅
Approved
Accepted, processing reimbursement.
❌
Rejected
Declined, see comments for reason.